I’ve been experimenting with the new Salesforce DX MCP (Model Context Protocol) since its release last week, and it has genuinely changed how I work with Salesforce implementations. The idea of having an AI assistant that actually understands your org structure and can run SFDX commands directly sounded too good to be true, but it works surprisingly well.
My current setup uses IntelliJ with Illuminated Cloud 2, and getting Claude Code to work seamlessly with this stack took some figuring out. This guide covers everything I learned during the setup process, including the gotchas that tripped me up initially.
What We’ll Cover
- Setting up a Salesforce DX project in IntelliJ with Illuminated Cloud 2
- Installing and configuring Claude Code for Salesforce development
- Connecting Claude Code to your Salesforce orgs via MCP
- Practical examples and troubleshooting tips
- Security considerations for production environments
What is Salesforce DX MCP?
Before jumping into the setup, let me explain what we’re working with. Model Context Protocol (MCP) is an open standard designed to solve the fragmentation problem in AI tool integrations. Think of it as a universal standard that lets different AI systems communicate with various services without custom integrations.
Salesforce DX MCP is Salesforce’s implementation of this protocol, specifically built for Salesforce development workflows.
The main benefit I’ve noticed is that Claude Code now uses the correct, up-to-date sf CLI commands instead of hallucinating outdated sfdx syntax or suggesting deprecated flags. I was getting frustrated with regular AI assistants giving me commands that didn’t work or were deprecated. With MCP, it actually knows what’s in my org and suggests appropriate commands.
For example, when I asked it to help with a custom object query, it knew the exact field names and relationships in my org rather than making generic assumptions.
Quick Start Guide
If you’re comfortable with command-line tools and just want to get running quickly, here’s the essential setup:
# 1. Install prerequisites
node --version  # Ensure Node.js 18+
npm install -g @anthropic/claude-code @salesforce/mcp

# 2. Create SFDX project in IntelliJ
# File → New → Project → Illuminated Cloud → Salesforce DX

# 3. Authenticate Claude Code
claude  # Opens browser for authentication

# 4. Configure MCP
{
  "servers": {
    "salesforce": {
      "type": "stdio",
      "command": "npx",
      "args":
    }
  }
}
EOF

# 5. Start Claude Code in your project
cd your-sfdx-project
claude
> /init  # Initialize project context
> list all custom objects in my org  # Test connection
That’s the basics covered. If you want more detailed explanations and troubleshooting help, keep reading.
Prerequisites
Before you start, make sure you have these installed:
Required Software
- IntelliJ IDEA (Community or Ultimate Edition)
- Illuminated Cloud 2 plugin for IntelliJ
- Node.js 18+ and npm
- Salesforce CLI (sf commands)
- Install:
npm install -g @salesforce/cli - Verify:
sf --version
- Install:
Required Accounts
- Salesforce Developer Edition
- Claude Subscription (Pro works -$20/month)
Optional but Helpful
- Git for version control
- Terminal application
- Basic familiarity with command line operations
Note: This guide focuses on macOS setup. The process is similar for Windows and Linux with minor path differences.
Creating an SFDX Project in IntelliJ + Illuminated Cloud 2
Step 1: Create New SFDX Project in IntelliJ
- Open IntelliJ IDEA and create a new project:
File → New → Project
- Configure the Project Type:
- Select “Illuminated Cloud SFDX” as the project type
- Choose your project location
- Name your project (e.g.,
my-sfdx-mcp-project)
- Set Up Org Connection:
- Click the “Add Connection”
- In the Connections modal, click “Create Connection” (plug icon)
- Select your organization type(Choose Production):
- Production – for Developer Edition orgs & Prod
- Sandbox – for sandbox environments
- Development – for development orgs
- This will redirect to your browser for authentication
- Initialize the Project:
- Click “Next” → “Finish”
- Wait for IntelliJ to download and index your metadata (this may take 2-3 minutes)
Tip: If the metadata download takes too long, you can cancel and manually retrieve specific metadata later using the IC2 metadata browser.
Step 2: Verify SFDX Project Structure
Your project should now have this structure:
Setting Up Claude Code on Mac
Now let’s get Claude Code working with our SFDX project.
Prerequisites Check
First, ensure you have Node.js installed (Claude Code requires Node.js 18+). Open the terminal in IntelliJ and run:
# Check if Node.js is installed and version
node --version
npm --version
Important: You need Node.js 18 or higher. If you see a lower version or “command not found”, follow the installation steps below.
If you don’t have Node.js or have an older version:
- Download and install Node.js from nodejs.org
- Choose the LTS version (recommended for most users)
- Run the installer and follow the setup wizard
- Restart your terminal and verify installation:
node --version  # Should show v18.x.x or higher
npm --version   # Should show 9.x.x or higher
Alternative installation methods:
- Homebrew:
brew install node - nvm (Node Version Manager):
nvm install --lts
Step 1: Install Claude Code
added 1 package in 12sclaude-code v1.x.xStep 2: Authentication Setup
Claude Code is now included with your Claude Pro subscription ($20/month), making the setup much simpler:
- Run Claude Code for the first time:
claude
-
Browser Authentication:
-
Your default browser will open automatically
-
Sign in with your Claude Pro account
-
Grant the necessary permissions
-
Return to your terminal
-
Verify Authentication:
-
You should see a success message in the terminal
-
The prompt should change to
claude>
Note: Claude Code requires an active Claude subscription.
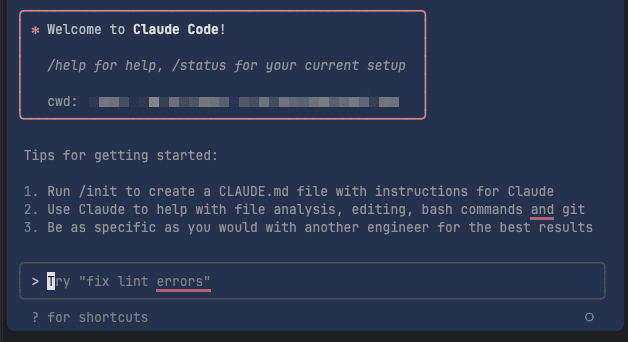
Step 3: Test Claude Code Installation
Open the project in IntelliJ and navigate to the terminal and test Claude Code:
# Start Claude Code
claude

# Initialize project context (IMPORTANT!)
> /init

# Test basic functionality
> explain the project structure
Important: Always run /init when starting a new Claude Code session. This creates a claude.md file that provides essential project context, which makes Claude’s responses much more accurate.
I learned this the hard way – without running /init, Claude Code was giving me generic Salesforce advice instead of suggestions specific to my project structure and org setup.
Setting Up Salesforce DX MCP Server
This is the key part – connecting Claude Code to your Salesforce orgs through MCP.
Step 1: Install Salesforce DX MCP Server
# Install the official Salesforce DX MCP server
npm install -g @salesforce/mcp

# Verify installation
npx @salesforce/mcp --help
You should see the MCP help menu with available commands and options.
Step 2: Configure Salesforce DX MCP Server for Claude Code
This configuration step works for all IDEs (IntelliJ, VS Code, Cursor, Cline, Windsurf). Simply create a .mcp.json file in your project root:
# Navigate to your SFDX project root
cd /path/to/your-sfdx-project

# Create local MCP configuration
cat > .mcp.json << 'EOF'
{
  "mcpServers": {
    "salesforce DX": {
      "command": "npx",
      "args": ,
      "env": {}
    }
  }
}
EOF
Alternative: Let’s ask Claude Code to configure automatically
For any IDE, you can also let Claude Code configure it for you:
# Start Claude Code in your project directory
claude
> Configure Salesforce DX MCP to Claude Code locally to this project
{
  "mcpServers": {
    "salesforce DX": {
      "command": "npx",
      "args": ,
      "env": {}
    }
  }
}
Testing Your Configuration
⚠️ Important: Restart Claude Code After MCP Configuration
After creating or modifying your MCP configuration, you MUST restart Claude Code for the changes to take effect.
Let’s verify everything is working correctly.
Basic MCP Connection Test
# In IntelliJ terminal, start Claude Code
claude

# Initialize project context (if not already done)
> /init

#Check Salesforce DX MCP
>/mcp

# Test MCP connection
> list all custom objects in my org

If everything’s working, Claude should respond with a list of custom objects from your org without any connection errors.
Try These Test Commands
# Test org access
> show me the schema for Account object

# Test metadata operations
> what apex classes do I have in this org?

# Test SOQL capabilities
> query the last 5 opportunities created

# Test deployment status
> check the deployment status of my recent changes
Common Use Cases and Practical Examples
Here are some ways I’ve found this setup particularly useful. These aren’t hypothetical examples – these are actual tasks I’ve done this week:
Code Review and Analysis
# Analyze existing Apex class
> analyze AccountTriggerHandler.cls for best practices and performance issues

# Check test coverage
> check test coverage for AccountTriggerHandler and identify gaps

# Generate test methods
> create comprehensive test methods for AccountTriggerHandler with bulk scenarios
Deployment Management
# Deploy with validation
> validate and deploy force-app/main/default/classes/* to my sandbox

# Monitor deployment
> show me the current deployment status with any errors

# Rollback if needed
> how can I rollback the last deployment if there are issues?
Schema Documentation & Analysis
# Document custom objects
> create comprehensive documentation for all custom objects

# Analyze object relationships
> show me all relationships between Account, Opportunity, and custom objects

# Field usage analysis
> find all unused custom fields on the Account object
Data Quality & Cleanup
# Find data issues
> find all accounts without contacts or open opportunities

# Identify duplicates
> identify potential duplicate accounts based on name and website

# Data migration prep
> generate a data model diagram for migrating legacy customer data
Performance Optimization
# SOQL optimization
> analyze and optimize this SOQL query for better performance

# Apex optimization
> review BatchAccountProcessor.cls for governor limit issues

# Bulk operation analysis
> check if this trigger will handle bulk operations efficiently
Advanced Configuration Tips
Best Practice: Always Initialize Project Context
Before working with any SFDX project in Claude Code, run:
> /init
This creates a claude.md file that provides Claude with essential project context, leading to much more accurate suggestions and better understanding of your codebase.
Tip 1: Environment-Specific Tool Configuration
You can customize which MCP tools are available based on your environment:
# For production - only enable safe, read-only tools
npx @salesforce/mcp --orgs production --toolsets query,metadata

# For sandbox - enable all tools for full development capabilities
npx @salesforce/mcp --orgs sandbox --toolsets all
Tip 2: Multi-Environment MCP Configuration
# ~/.config/claude-code/mcp.json
{
  "servers": {
    "salesforce-prod": {
      "type": "stdio",
      "command": "npx",
      "args":
    },
    "salesforce-sandbox": {
      "type": "stdio",
      "command": "npx",
      "args":
    }
  }
}
—
Troubleshooting
Common Issues and Solutions
Issue 1: MCP Connection Failed
Symptoms: “Failed to connect to MCP server” error
Solutions:
# 1. Check if you're authenticated to Salesforce
sf org list

# 2. Set default org if not set
sf config set target-org=your-org-alias

# 3. Restart Claude Code
# Exit with ctrl+c and run claude again
Issue 2: Node.js Version Errors
Symptoms: “Node version 18 or higher required”
Solutions:
# Check current version
node --version

# Update Node.js using nvm
nvm install --lts
nvm use --lts

# Or update using Homebrew
brew upgrade node
Issue 3: Permission Denied During Installation
Symptoms: npm install fails with EACCES error
Solutions:
# Option 1: Use sudo (not recommended)
sudo npm install -g @anthropic/claude-code

# Option 2: Fix npm permissions (recommended)
mkdir ~/.npm-global
npm config set prefix '~/.npm-global'
echo 'export PATH=~/.npm-global/bin:$PATH' >> ~/.zshrc
source ~/.zshrc
Issue 4: Claude Code Not Recognizing Project
Symptoms: Claude doesn’t understand project structure
Solutions:
# 1. Ensure you're in the project root
pwd  # Should show your SFDX project directory

# 2. Run /init to create context file
> /init

# 3. Verify sfdx-project.json exists
ls sfdx-project.json
Issue 5: Org Authentication Issues
Symptoms: “No default org found” errors
Solutions:
# Re-authenticate to your org
sf org login web --alias my-org --set-default

# Verify authentication
sf org display
Security Considerations
Production Environment Best Practices
Important: When working with production orgs, always follow these security guidelines:
1. Limit MCP Toolsets
// Production configuration - read-only access
{
  "servers": {
    "salesforce-prod": {
      "type": "stdio",
      "command": "npx",
      "args":
    }
  }
}
Command Reference
Essential Claude Code Commands
Command
Description
Example
/init
Initialize project context
> /init
/help
Show available commands
> /help
/clear
Clear conversation history
> /clear
/exit
Exit Claude Code
> /exit
Useful Salesforce MCP Commands
Use Case
Command Example
List Objects
> list all custom objects
View Schema
> show schema for Contact
Query Data
> query all accounts
Check Limits
> show org limits and usage
View Metadata
> list all apex classes with test coverage
Deploy Code
> deploy force-app/main/default to sandbox
FAQs
Q: Can I use Claude Code with VS Code instead of IntelliJ?
A: Yes! The MCP configuration works with any IDE. Just ensure you’re in your SFDX project directory when running Claude Code.
Q: Is Claude Code free with Claude Pro?
A: Yes, Claude Code is included with your Claude Pro subscription ($20/month).
Q: Can I connect multiple orgs simultaneously?
A: Yes, you can configure multiple MCP servers for different orgs in your mcp.json configuration.
Q: Does this work with scratch orgs?
A: Absolutely! Just ensure your scratch org is set as the default target org using sf config set target-org.
Q: What’s the difference between sfdx and sf commands?
A: sf is the newer, unified Salesforce CLI. Claude Code with MCP uses the modern sf syntax automatically.
Conclusion
Setting up Salesforce DX MCP with Claude Code has changed how I approach Salesforce implementation. Having an AI assistant that understands both my codebase and my org structure makes a noticeable difference in day-to-day implementation work.
The initial setup takes some time, but the benefits become apparent pretty quickly. If you’re already using Claude Code for other design & development work, this integration is worth trying.
What’s Next? I’ll continue exploring Salesforce DX MCP and share more insights from my experience. Stay tuned!
** #SalesforceDX #MCP #ClaudeCode #SalesforceAI #SalesforceDevelopment #IntelliJ #IlluminatedCloud #ModelContextProtocol #SalesforceImplementation #AIAgent #SFDX #Agentforce
Some benefits I’ve noticed:
- Faster development for routine tasks
- Better code analysis and suggestions
- Helpful documentation generation
- Improved code quality checks
- Learning new patterns and approaches
After using it for a week, I’ve found it useful for:
- Implementation Planning
- Solution Design & Documentation
- Org Analysis & Assessment
- Automating some repetitive coding tasks
- Identifying potential issues before deployment
- Generating test classes with good coverage
- Code reviews
What’s Next?
I’ll continue exploring Salesforce DX MCP and share more insights from my experience with different configurations and use cases.
Resources
- Claude Code Quickstart Guide
- Salesforce DX MCP GitHub
- Illuminated Cloud - Getting Started
- Level Up Your Developer Tools with Salesforce DX MCP
Tags: #SalesforceDX #MCP #ClaudeCode #SalesforceAI #SalesforceDevelopment #SalesforceAdministration #IntelliJ #IlluminatedCloud #ModelContextProtocol #SalesforceImplementation #AIAssistant #SFDX #Agentforce #DeveloperProductivity #AITools